Swift如何给应用添加3D Touch菜单
今天为大家带来的是给应用添加3D Touch菜单,这样可以方便用户在首页即可快速访问某些页面。 以OneDay为例,通过3D Touch用户可以快速选择进入到添加页面、设置页面、归档页面、首页。
一、创建自定义的3D Touch菜单
在AppDelegate的didFinishLaunchingWithOptions中,我们添加下列代码,来实现按钮的添加。
//添加icon 3d Touch
let firstItemIcon:UIApplicationShortcutIcon = UIApplicationShortcutIcon(type: .confirmation)
let firstItem = UIMutableApplicationShortcutItem(type: "1", localizedTitle: NSLocalizedString("Home", comment: "Home icon"), localizedSubtitle: nil, icon: firstItemIcon, userInfo: nil)

let firstItemIcon1:UIApplicationShortcutIcon = UIApplicationShortcutIcon(type: .taskCompleted)
let firstItem1 = UIMutableApplicationShortcutItem(type: "2", localizedTitle: NSLocalizedString("Archive ", comment: "Archive icon"), localizedSubtitle: nil, icon: firstItemIcon1, userInfo: nil)


let firstItemIcon2:UIApplicationShortcutIcon = UIApplicationShortcutIcon(type: .task)
let firstItem2 = UIMutableApplicationShortcutItem(type: "3", localizedTitle: NSLocalizedString("Setting", comment: "Setting icon"), localizedSubtitle: nil, icon: firstItemIcon2, userInfo: nil)


let firstItemIcon3:UIApplicationShortcutIcon = UIApplicationShortcutIcon(type: .add)
let firstItem3 = UIMutableApplicationShortcutItem(type: "4", localizedTitle: NSLocalizedString("Add", comment: "Add icon"), localizedSubtitle: nil, icon: firstItemIcon3, userInfo: nil)

application.shortcutItems = [firstItem,firstItem1,firstItem2,firstItem3]
其中按钮的icon使用系统的icon图片,其他图样可以参考这个链接。
二、为每个按钮添加响应事件
接着我们为每个按钮添加响应事件,因为我的四个按钮刚好都到一个固定页面,所以响应事件实现页面的跳转即可。
绑定按钮的事件函数:
func application(_ application: UIApplication, performActionFor shortcutItem: UIApplicationShortcutItem, completionHandler: @escaping (Bool) -> Void) {
        let handledShortCutItem = handleShortCutItem(shortcutItem: shortcutItem)
        completionHandler(handledShortCutItem)
    }
函数的具体代码:
func handleShortCutItem(shortcutItem: UIApplicationShortcutItem) -> Bool {
    var handled = false

    if shortcutItem.type == "1" { //首页

        let rootNavigationViewController = window!.rootViewController as? UINavigationController
        let rootViewController = rootNavigationViewController?.viewControllers.first as UIViewController?

        rootNavigationViewController?.popToRootViewController(animated: false)
        handled = true

    }
    if shortcutItem.type == "2" { //编辑

        let rootNavigationViewController = window!.rootViewController as? UINavigationController
        let rootViewController = rootNavigationViewController?.viewControllers.first as UIViewController?

        rootNavigationViewController?.popToRootViewController(animated: false)
        rootViewController?.performSegue(withIdentifier: "toArchive", sender: nil)
        handled = true

    }

    if shortcutItem.type == "3" { //设置

        let rootNavigationViewController = window!.rootViewController as? UINavigationController
        let rootViewController = rootNavigationViewController?.viewControllers.first as UIViewController?

        rootNavigationViewController?.popToRootViewController(animated: false)
        rootViewController?.performSegue(withIdentifier: "toSetting", sender: nil)
        handled = true

    }

    if shortcutItem.type == "4" { //编辑

        let rootNavigationViewController = window!.rootViewController as? UINavigationController
        let rootViewController = rootNavigationViewController?.viewControllers.first as UIViewController?

        rootNavigationViewController?.popToRootViewController(animated: false)
        rootViewController?.performSegue(withIdentifier: "addTodo", sender: nil)
        handled = true

    }

    return handled
}
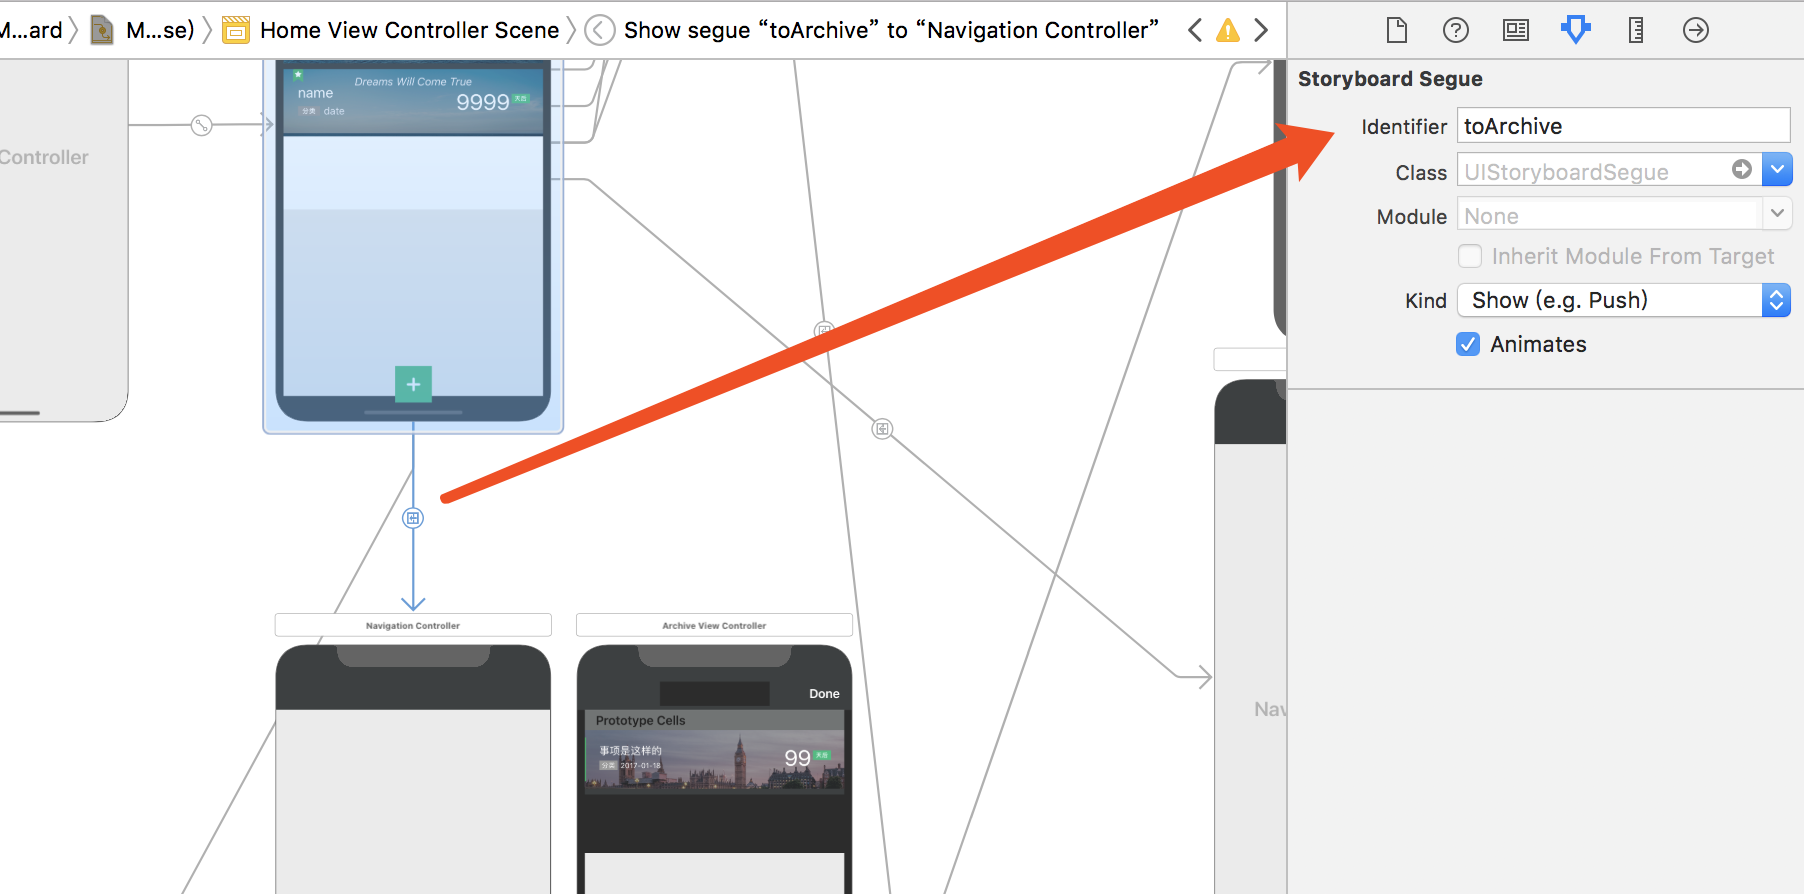
这里我用到了performSegue,所以在Main.storyboard中会给每个跳转绑定ID。
后续将补充介绍如何自定义icon、如何在页面内实现3D Touch,欢迎关注OneSwift的后续更新。
GitHub:OneSwift - iOS Tips Based On Swift
微博:xDEHANG